")
What Size Guide Rail Do I Need? Choosing the Right Length (and When to Use Extensions)
The scenario: you need to make a cut in that full size plywood panel sitting in the corner of your shop. You’ve wrestled the plywood panel to the ground, measured twice, made your marks, and placed your longest guide rail on the sheet–ready to make the cut. But, you’ve come up six inches short.
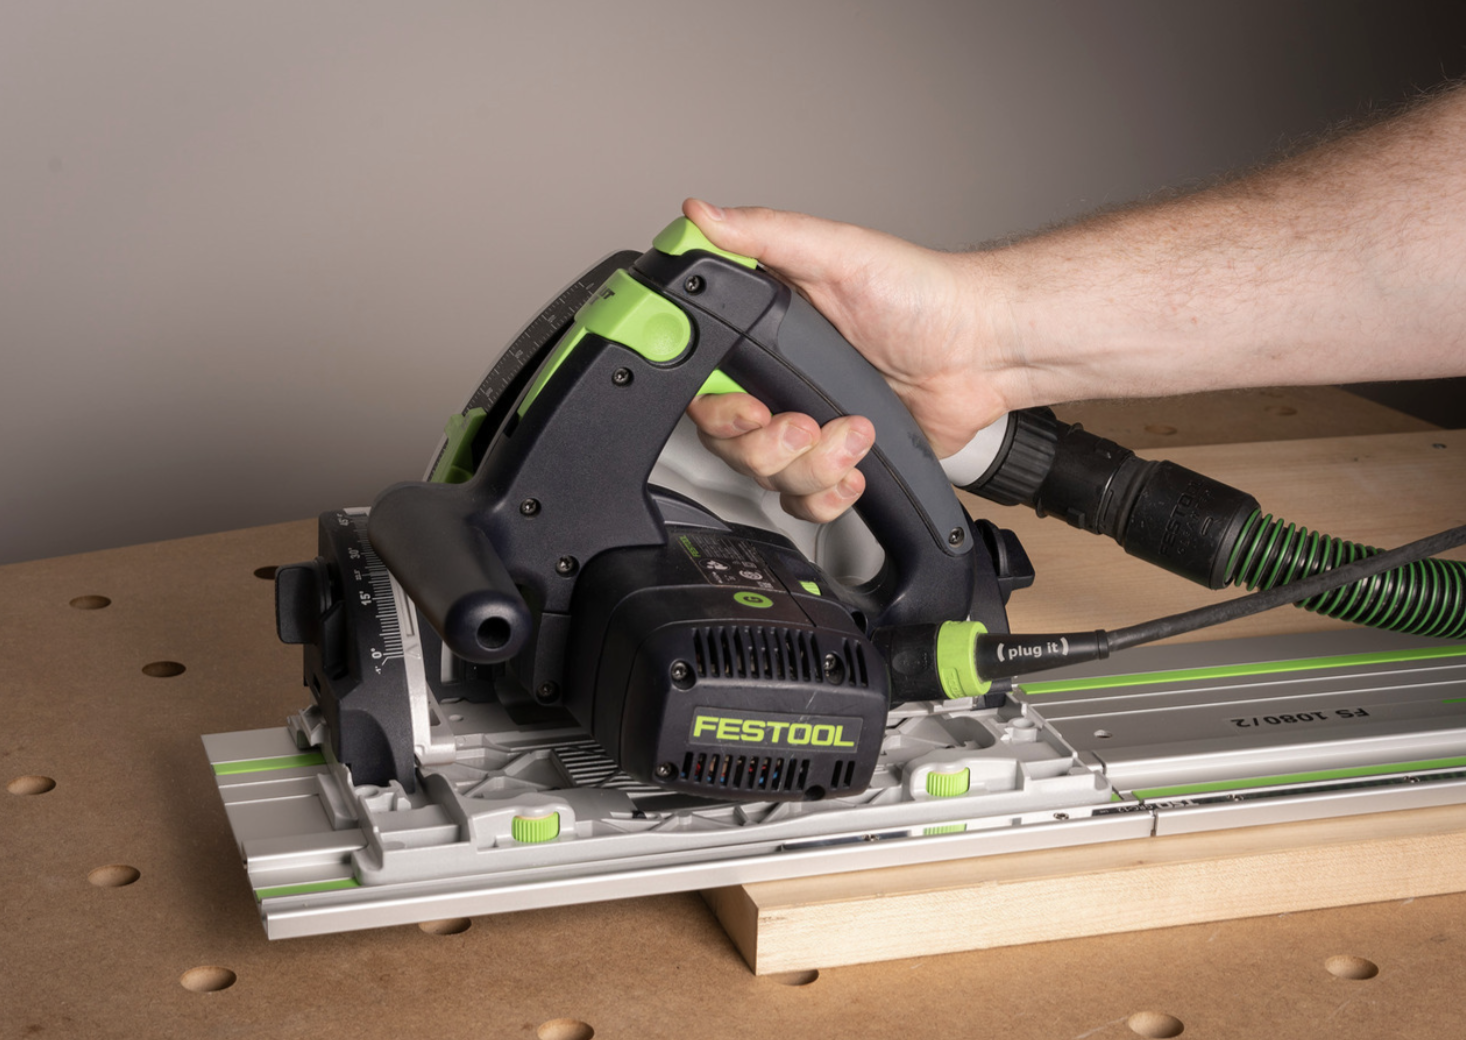
This happens more than you'd think. Most track saws come with a 55" rail—perfect for crosscuts but too short for many sheetgood applications, especially when you factor in the additional track length you need before and after the cut. The question becomes: what size rail should you buy next?
The answer depends on what you're actually cutting, how much space you have, and whether you want maximum reach or maximum versatility. Long rails span full sheets but they're heavy and awkward for everyday cuts. Short rails are easy to handle but limiting. Extensions and connectors offer a middle path—modular systems that adapt to different tasks.
This guide helps you choose the right rail configuration for your shop. We'll look at standard lengths, when to use connectors versus buying longer rails, and how small extensions solve common frustrations without overbuying.
Standard Guide Rail Lengths Explained
Rail lengths aren't random—they're sized around common cutting tasks.
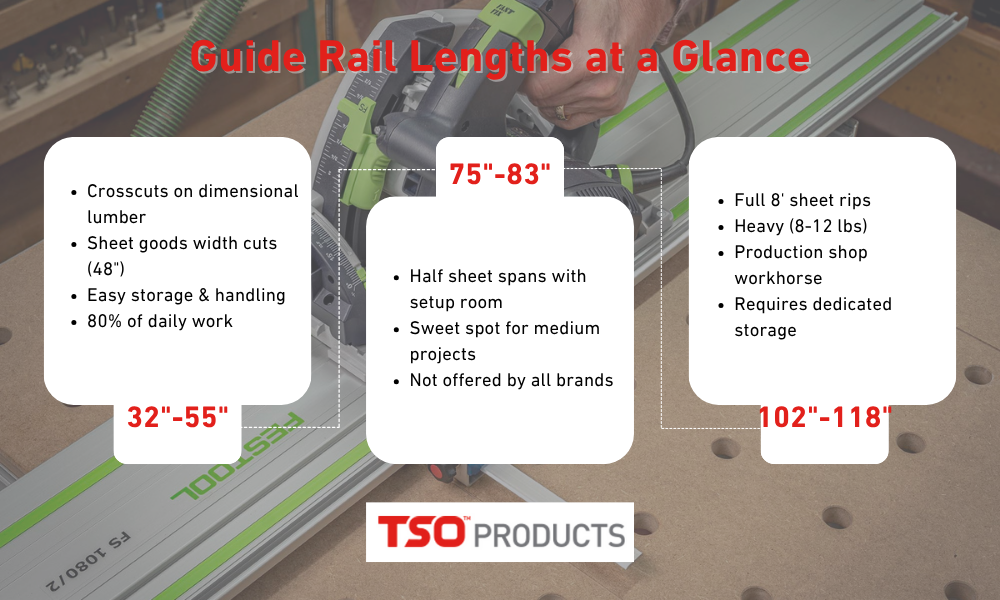
Short Rails (32" - 55")
Most track saw kits include a 55" rail. It handles most crosscut duties, repeated cuts on smaller stock, and breaks down sheetgoods across the width of a standard 4x8 sheet (48" cuts). These rails are light, easy to position, and store anywhere. For many woodworkers, a 55" rail does 80% of the work.
Medium Rails (75" - 83")
Less common but useful for specific applications. A 75" rail spans a half sheet (48") with comfortable room on both ends for track saw support. Still manageable for one person but these longer rails give more flexibility than a 55". Not every brand offers this length.
Long Rails (102" - 118")
These span full 8' sheet goods lengthwise with room for saw entry and exit. Professional shops breaking down sheets daily appreciate the efficiency. The tradeoff: they're heavy (8-12 lbs), awkward to position alone, and require dedicated storage space. Simply swinging them out of storage and positioning for use can be a delicate shuffle. For occasional use, they're often overkill.
What You're Actually Cutting
Sheet goods present two primary cutting scenarios: crosscuts across the 48" width and rips along the 96" length.
The first cut on any sheet is often the most important—removing the factory edge along the full 96" length to establish a true, square reference. Without this cut, your subsequent measurements and cuts inherit the factory's imperfections. This alone makes longer rail capacity essential.
Beyond that initial edge cleanup, you'll make crosscuts at 48" (which a 55" rail handles comfortably) and occasional full-length rips when breaking down sheets into narrower sections.
Track saws excel at sheet goods work. For dimensional lumber, they're less practical. Crosscutting boards is better suited to a miter saw—faster setup, cleaner results, purpose-built for the task. While you can rip dimensional lumber with a track saw, most ripping happens across the board's width, not its length, so a 55" rail provides adequate capacity.
The reality: a 55" rail handles crosscuts and many ripping tasks well. But for complete sheet goods processing, you need the ability to span 96" plus saw overlap. The question isn't whether you need longer capacity, but how you want to achieve it: one long rail or connected shorter rails.
One Long Rail vs. Two Short Rails
This decision affects your workflow more than the length difference suggests.
The Single Long Rail Approach
A 110" rail spans anything you'll cut in a typical shop. Set it down, make your cut, done. No connection points, no alignment concerns, fastest setup for long rips.
The problems show up in daily use. Long rails are heavy, removing from storage and positioning one alone on a full sheet requires careful handling. Storage becomes an issue in smaller shops. And if you’re using a much longer guide rail than you need for any particular cut, you’ll have to support the remainder of the guide rail with blocking of the same workpiece thickness; a hassle.
Long rails make sense for professional cabinet shops doing production work, as they’re likely to also have shorter guide rails within reach. If you're breaking down multiple sheets daily, the efficiency gain justifies the handling. For everyone else, it's worth considering alternatives.
The Multiple Shorter Rails Approach
Two 55" rails give you options. Use them individually for most work—lighter, more maneuverable, easier to store. When you need longer reach, connect them together. Total cutting length with a quality connector: about 106", enough for full sheet rips.
This system costs slightly more upfront (two rails plus connector versus one long rail), but you get versatility. Each rail works independently. Storage is simpler: vertical against a wall, in a saw case, wherever you have 5 feet of space.
The tradeoff: connecting rails takes an extra 30 seconds and requires a quality connector to maintain accuracy. Poor connectors introduce alignment errors that could ruin cuts.
What Works for Most Shops
Unless you're doing production work with constant long rips, multiple shorter rails make more sense. You get the flexibility to adapt to different tasks without wrestling a heavy rail for simple crosscuts. Start with the 55" rail from your kit, add a second 55" when budget allows, and use a quality connector when you need longer reach.
The modular approach matches how most woodworkers actually work.
![]()
GRC-12 Guide Rail Connectors: Making Modular Systems Work
Connectors turn separate rails into longer cutting capacity—if they maintain accuracy. Poor connectors introduce the errors you bought a track saw to eliminate.
The Self-Aligning Solution
Traditional connectors require careful setup: sighting along rails, checking alignment with straightedges, making test cuts to verify the connection won't ruin your workpiece. It's tedious and still leaves room for error.
Self-aligning connectors solve this. They use precision-engineered features—like integral keystones or registration systems—to automatically position rails in perfect alignment when you tighten them. No secondary tools, no manual verification, no guesswork. Connect and cut.
What Quality Connectors Do
A good connector keeps rails in perfect alignment horizontally and vertically. Your saw shouldn't hesitate, catch, or deflect at the connection point. The cut should be as straight across the junction as it is along a single rail.
The frustration with cheap connectors is immediate. You set up a long cut, connect your rails, start cutting, and feel the saw bind slightly at the connection. The cut wavers. You've wasted material and time.
What to Look For
Quality connectors lock firmly into both rails with no play or movement. They should be easy to connect but secure when locked. Material matters—machined aluminum with tight tolerances delivers consistent results. Sloppy fit means sloppy cuts.
The best modern connectors eliminate alignment hassle entirely. Look for self-aligning designs that use mechanical features to register rails automatically. These remove human error from the equation.
Most connectors are brand-specific, though some universal designs work across similar rail profiles like Festool, Makita, Milwaukee, Kreg, and Triton systems. Verify compatibility before buying.
 Setting Up Connected Rails
Even with quality connectors, surface preparation matters. Rails must sit on the same plane with no twist or rocking. Use supports or sawhorses to maintain consistent height across the connection point.
With traditional connectors, you'd sight along the rails, clamp both guide rails to a straightedge, tighten the grub screws, run your hand across the junction, and make test cuts. Self-aligning connectors skip this verification—they're designed to achieve perfect alignment automatically when properly tightened.
Rail Extensions: Solving the "Almost There" Problem
You've measured, positioned your rail, and you're short by six inches. This scenario happens more than you'd expect.
The Common Frustration
Sheet goods that aren't quite standard dimensions. Needing a few extra inches for saw entry and exit. Setup room on one end that pushes the other end short.
The traditional solution: buy the next rail size up. Spend $300+ to solve a six-inch problem. Now you own a longer rail you don't need most of the time.
How Extensions Work
Rail extensions are small add-on pieces—typically 12" to 14" sections that clip or connect to the end of your existing rail. They provide just enough extra reach for edge cases without forcing you to buy a completely new rail.
Cost difference matters here. A quality extension runs $30-60. A full rail starts at $150 and goes up from there. For occasional needs, extensions make economic sense.
When Extensions Make Sense
Perfect for situations where you're regularly close but not quite there. Your 55" rail works for 90% of cuts, but occasionally you need 60". An extension solves this without buying a 75" rail.
They're also practical for jobsite work where material sizes vary. Throw a small extension in your track saw case. When you encounter an oddly-sized piece, you have the reach you need.
When They Don't
If you're regularly needing 15" or more additional length, you're better off with a proper longer rail or a connector system. Extensions handle the "almost there" problem, not fundamental capacity issues.
TSO Products Rail Extension for Festool
The GRE-13 Guide Rail Extension solves the 48" crosscut problem specifically for Festool FS rail systems. It combines a 13 5/8" section of genuine Festool guide rail with our GRC-12 self-aligning connectors, giving your 55" rail the extra reach needed for fully supported cuts across sheet goods.
The extension is compact enough to fit in a Systainer alongside your primary rail, making it practical for both shop and jobsite use. Because it uses authentic Festool rail sections and precision connectors, there's no compatibility guesswork—it works seamlessly with your existing Festool guide rail system.
Building Your Rail System: Practical Recommendations
Start with what handles most work, expand as actual needs reveal themselves.
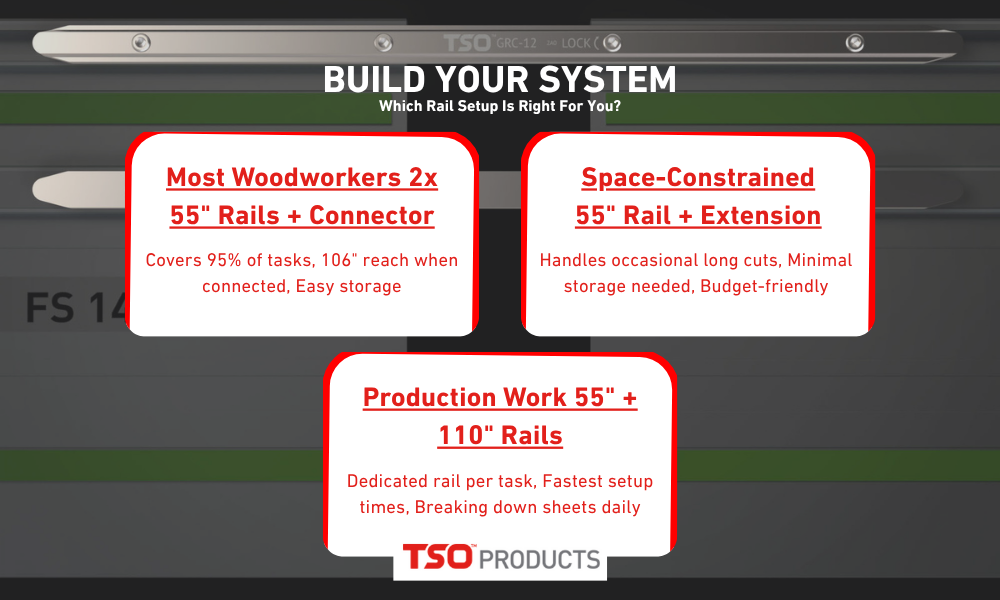
For Most Woodworkers: The 55" + 55" System
Start with the 55" rail that likely came with your track saw. When budget allows, add a second 55" rail and a quality connector. This combination covers about 95% of typical shop tasks.
For Space-Constrained Shops: The Extension Strategy
If you're working in a garage or basement shop with limited space, start lean. Use the 55" rail from your kit and add an extension for occasional longer reach. This avoids buying a second rail until you truly need it.
For Production Work: The 55" + 110" System
Professional cabinet shops and production environments benefit from dedicated rails for different tasks. Keep a 55" rail for daily crosscuts and shorter work. Use a 110" rail specifically for breaking down full sheets. Minimal setup time when speed matters.
The Storage Reality Check
Before buying long rails, consider where they'll actually live in your shop. Can you access them easily when needed? Will they become the "too awkward to use" tool?
Rails you can't access easily don't get used. Better to have shorter rails you reach for readily than long rails that stay in the corner because they're a pain to wrestle out.
Making the Right Choice for Your Shop
Don't buy for the project you might do someday. Build your system around the work you're doing now, and expand deliberately as your needs actually grow.
Recent Posts
-

How to Use a Wood Router for Clean, Controlled Cuts
A wood router is one of the most versatile tools in any woodworking shop. It edges, joints, shapes, …6th Mar 2026 -

Woodworking Jigs That Improve Accuracy and Repeatability
Every experienced woodworker reaches a point where freehand work and careful measuring hit a ceiling …3rd Mar 2026 -

Festool Domino Accessories: Why the BigFoot Base System Is Worth a Look
The Festool Domino handles edge mortising well out of the box. Face mortising is a different story. …24th Feb 2026