4 Key Tips for Woodworking With Live Edge Slabs
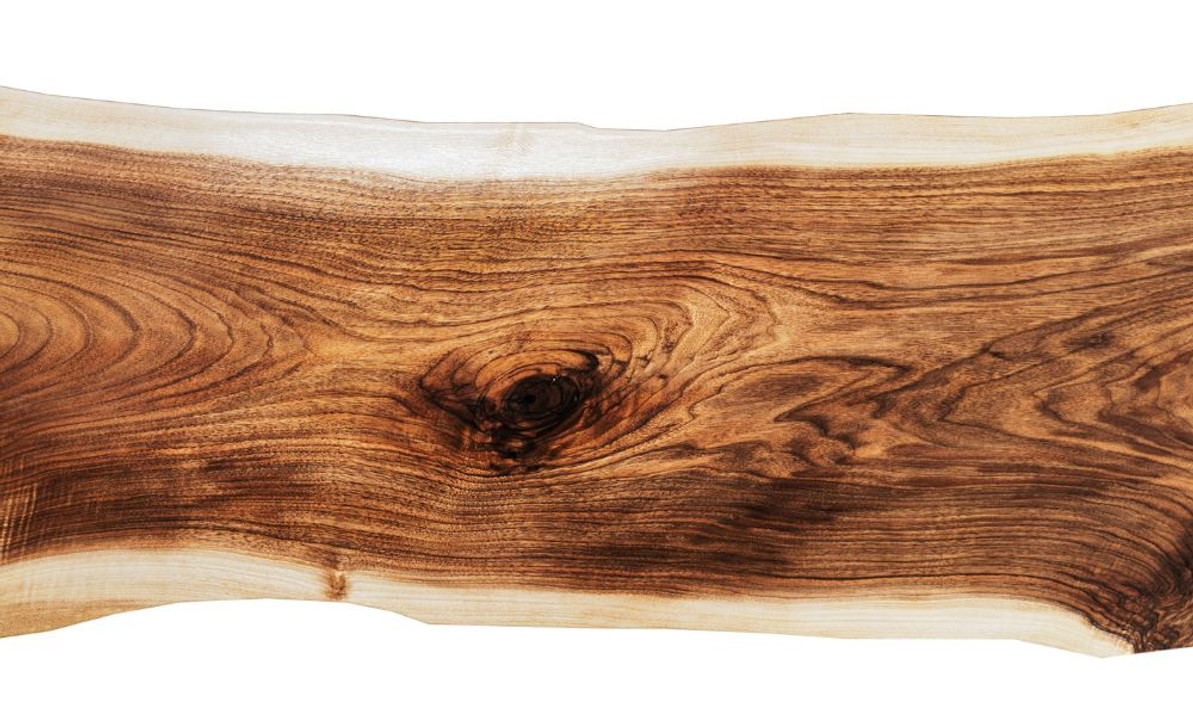
Live edge slabs accentuate the natural beauty of wood and its unique characteristics to make stunning pieces. However, working with live edge slabs requires a different approach than traditional woodworking. Take note of these tips for woodworking with live edge slabs to get the most out of your projects.
Step 1: Material Selection
Consider the wood’s species, size, thickness, and stability. While it’s ideal to avoid wood with cracks, knots, and warping, some degree of defects, or “natural character,” will always be present.
Work with the wood’s natural characteristics, stabilize it if necessary, and accentuate or hide elements to achieve the right aesthetic. For example, butterfly joinery can address cracking or checking. Soft spots or holes should first be completely cleared and can be filled with epoxy resin (for larger voids) or CA glue (for smaller voids).
Before starting your live edge project, ensure the internal moisture level of the wood is suitable for fine woodworking. Moisture levels vary by region, but you generally want to ensure moisture levels don’t exceed 12 percent. Ensure the slab is properly kiln-dried or utilize a wood moisture meter to confirm it. Live edge slabs with unacceptable levels of internal moisture can result in warping or finish issues.
Step 2: Plan It Out
Start with a clear plan in place.
Should the live edge sit outward or through the middle of two pieces and joined with epoxy? Woodworkers often create a quick frame as a template for making rough markings. Consider these measurements “rough,” and keep your piece slightly oversized, as you can cut it to the final dimension later.
For larger slabs, many woodworkers prefer to bring the tool to the wood, using track saws to perform accurate, straight-line rips. If your project requires square cuts, consider accessories like the GRS-16 Guide Rail Square, which attaches to the guide rail and ensures perfect 90-degree cuts.
Step 3: Tool Selection
After making rough cuts, you’ll need to flatten both sides of the slab. Woodworkers often utilize a wide-belt sander or large gantry-style CNC router with a surfacing bit to flatten both sides of the slab’s surface.
Live edge slabs are heavy, so proper support is critical. Consider heavy-duty work supports like the Bora Centipede which can support up to 6,000 lbs. evenly distributed across the top.
Step 4: Finish With Care
Choose a finish that will enhance the wood’s natural beauty while protecting it from damage. Options include tung oil, wax, or clear polyurethane. Apply the finish evenly and in thin coats, and allow adequate drying time between coats. Use power buffers and sanders to speed up this process.
Achieve the best results for all your woodworking projects. At TSO Products, we offer high-quality precision woodworking tools like the world’s best-selling guide rail squares, parallel guide systems, and precision triangles.
Recent Posts
-
Building Your Own DIY MFT/3-Style 20mm Workbench Table
The 20×96mm workbench standard popularized by Festool’s MFT/3 has become a go-to foundation in moder …27th Jan 2026 -
JessEm Stock Guides for DeWalt Table Saws: Precision & Consistency
JessEm Stock Guides give you consistent hold-down pressure, one-way feed control, and include a slig …19th Dec 2025 -
What Size Guide Rail Do I Need? Choosing the Right Length (and When to Use Extensions)
The scenario: you need to make a cut in that full size plywood panel sitting in the corner of your s …6th Nov 2025


