3 Ways To Drill Perpendicular Holes Without a Drill Press
While a drill press is a fantastic tool for drilling perpendicular holes consistently, not every woodworker has access to one. Perhaps the project has matured to a stage where you can no longer “bring the workpiece to the tool.” Fortunately, there are other ways to drill perpendicular holes without a drill press.
Using Plywood Drill Guides
One of the simplest and most cost-effective ways to drill perpendicular holes without a drill press is by creating plywood drill guides. Here's how to do it:
Materials Needed: Plywood sheet (3/4" or thicker), saw, measuring tape, clamps, drill bit, and drill.
- Measure and Cut: Measure and cut a piece of plywood into a rectangular shape, roughly 4x4 inches.
- Drill the “Starter” Hole: Drill a hole in this block using the exact same drill bit you’ll use to bore the finished holes in your workpiece.
- Clamp the Plywood Guide: Securely clamp the plywood guide to your workpiece, ensuring the hole in your guide block matches the desired hole position on your final workpiece. If you can’t get clamps in this position, the painter’s tape and CA glue method works just as well. If you’re concerned about backside blow-out of the drill bit, now is the time to secure a backer block to the underside of the finished panel.
- Drill Carefully: Insert your drill bit into the starter hole and drill through the guide into your workpiece, maintaining a steady hand and applying even pressure. Let the guide block direct your drilling angle. Replace the guide after the starter hole becomes loose.
Using Precision Metal Guide Bushings
Precision metal guide bushings, like those offered in the Parf Guide System Mark II, offer a more durable and precise solution for perpendicular holes. Follow these steps:
Materials Needed: Precision metal guide bushing set, drill, drill bit, and clamps.
- Select the Appropriate Bushing: Choose a guide bushing from your set that matches the diameter of your desired hole.
- Secure the Guide Bushing: Attach the selected guide bushing to the base of your drill, and secure it firmly.
- Mark Hole Placement: Mark the exact location where you want to drill the hole on your workpiece.
- Drill with Precision: Align the guide bushing with your marked spot and drill your hole, maintaining a steady hand and consistent pressure. A light machine oil applied to the inside of the bushing eliminates any friction between the drill bit and bushing.
Using a Portable Drill Guide Tool
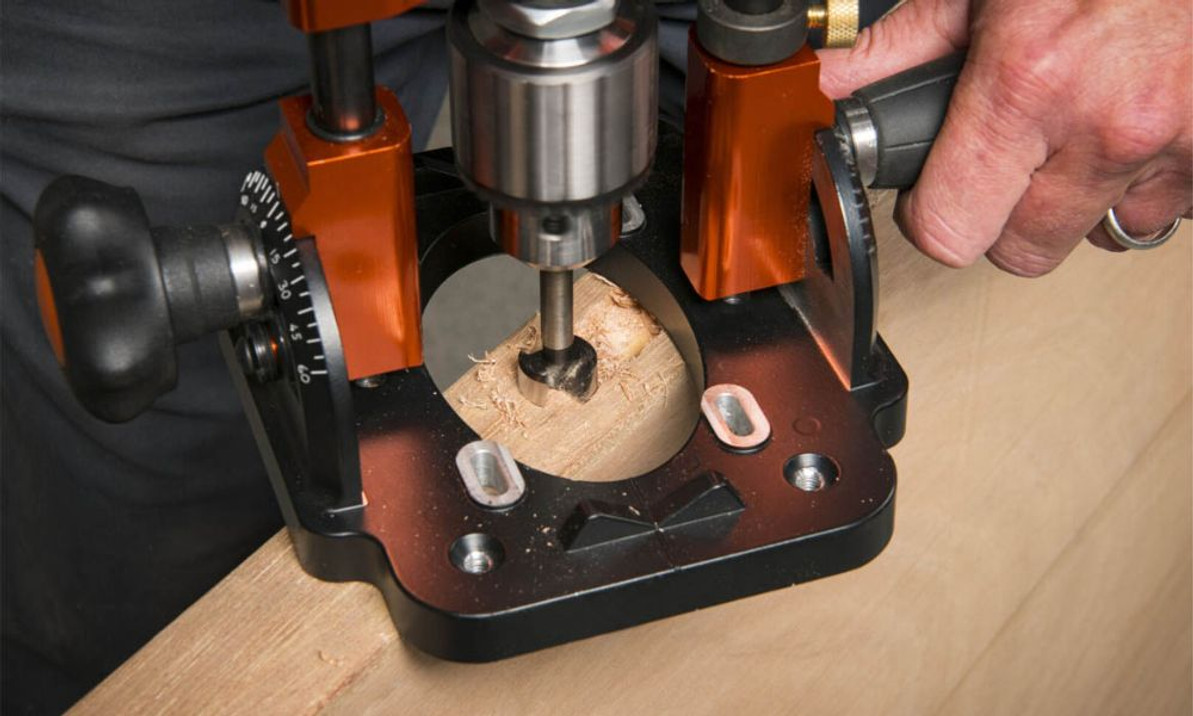
Portable drill guide tools are designed for achieving perpendicular holes without a drill press. They’re particularly useful in allowing you to take the “drill to the workpiece” once your project has become too large or unwieldy to bring to a drill press. Here's how to use one:
Materials Needed: Portable drill guide tool, drill, drill bit, and clamps.
- Set Up the Tool: Follow the manufacturer's instructions to set up the portable drill guide tool to the desired angle of cut. Attach your drill to the end of the drill guide, and install the appropriate drill bit.
- Mark Your Hole: Mark the location of your hole on the workpiece using a combination square or appropriate measuring tool.
- Position the Tool: Place the portable drill guide tool over your marked spot. Optionally, secure it in place with woodworking clamps.
- Drill Precisely: Plunging your drill guide, bore the hole at the desired location while maintaining consistent pressure.
Recent Posts
-
Building Your Own DIY MFT/3-Style 20mm Workbench Table
The 20×96mm workbench standard popularized by Festool’s MFT/3 has become a go-to foundation in moder …27th Jan 2026 -
JessEm Stock Guides for DeWalt Table Saws: Precision & Consistency
JessEm Stock Guides give you consistent hold-down pressure, one-way feed control, and include a slig …19th Dec 2025 -
What Size Guide Rail Do I Need? Choosing the Right Length (and When to Use Extensions)
The scenario: you need to make a cut in that full size plywood panel sitting in the corner of your s …6th Nov 2025


