What Is the Five-Cut Method To Ensure Your Cuts Are Square?
Square lumber and square cuts are the foundation of many a woodworking project, from crafting a unique piece of fine furniture to building custom casework and cabinets. The ability to make square cuts is fundamentally crucial in achieving professional-grade results, so let’s discuss one quick and easy way to dial in your cuts for squareness: the five-cut method.
What Is the Five-Cut Method?
The Five-Cut Method is a technique used to determine the squareness of a sheet good panel. It’s a straightforward process that involves making four cuts around the perimeter of your panel, rotating it after each cut, measuring the final resulting offcut, and applying some simple math to determine squareness over a given length of cut.
It’s important to note that perfect squareness is impossible; the goal is to minimize any error over a given length such that any error is imperceptible to the human eye and within the specifications required for your project.
Tools You’ll Need
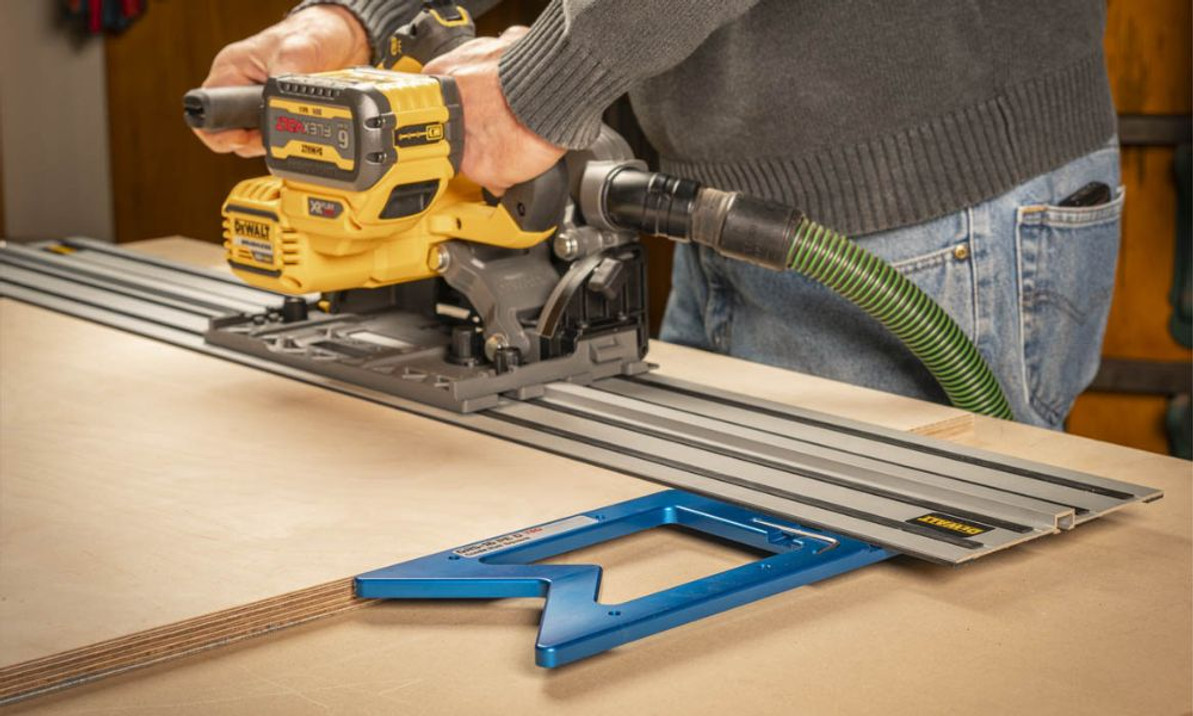
- Track (Plunge) Saw: A track saw is a guided system that rides on extruded aluminum tracks to provide the straightest possible cuts.
- GRS-16 Guide Rail Square: The GRS-16 is a precision tool that ensures the track saw cuts square to your workpiece. It attaches securely to your track saw’s guide rail and serves as a reliable reference point. You can also use a precision woodworking triangle to achieve similar results.
- Track Clamp: While not technically required, a clamp secures the guide rail to the top of your workpiece, ensuring the guide rail remains in a fixed position through the entire cut.
- Supportive Working Surface: A work surface that fully supports your workpiece is important, as any bowing or deflection in the panel or guide rail could contribute to inaccuracy in your cuts. A Festool MFT/3 MultiFunction Table or similar surface is ideal.
- Vernier Calipers: Required for measuring the squareness error at the end of this process.
How To Use the Five-Cut Method With a Track Saw and GRS-16 Guide Rail Square
- Prepare Your Workpiece: Start with a medium-sized panel, approximately 25" (635mm) on all four sides. This panel does not need to be perfectly square at this point. Secure it to your worktop with clamps and/or bench dogs so that it will not move during the cutting process.
- Set Up the GRS-16: Attach the GRS-16 Guide Rail Square to your track saw’s guide rail, clamping it down to ensure a snug and square connection.
- Make the First Cut: Before placing the guide rail assembly on your workpiece, mark the front-right corner of your workpiece with a “1,” denoting the first cut. Place the guide rail assembly and track saw on top of the workpiece, and position it such that you’ll be trimming off about 1/2" (13mm) from the right side of the workpiece. Make your first cut, ensuring the workpiece stays firmly against the GRS-16 throughout the entire cut.
- Rotate the Workpiece: After the first cut, rotate your workpiece 90 degrees clockwise (looking down at your work). The freshly cut edge should be against the GRS-16 Guide Rail Square now. Mark the front-right corner of your workpiece with a “2,” denoting the second cut.
- Repeat the Process: Make the second cut. Like last time, aim to remove about 1/2" (13mm) from the right side, keeping the workpiece firmly against the GRS-16 throughout the entire cut. Rotate the workpiece two more times, marking “3” and “4” on each remaining corner.
- Make the Final Cut: Rotate the workpiece clockwise one more time, returning to your original position with “1” marked in the bottom-right corner. Aim to remove about 1" (25mm) from the right side, being sure to support the offcut to prevent it from falling off the table.
- Inspect the Offcut: Examine the offcut. Using vernier calipers, measure the width of the offcut at each end, recording the result (we like to write the number on each side of the offcut). Measure the length of your offcut piece, as well as the length of the perimeter of your panel.
- Do the Math: Determine the difference in width between each side of the offcut piece. Then, add the lengths of all four sides of the panel, plus the length of the offcut. Finally, take the difference in the offcut and divide it by the total length of your cuts to determine the squareness error over your cut distance. For example:
- Measuring the offcut shows us one side is 0.985 and the other is 1.025, resulting in a total width difference of 0.04".
- Measuring the length of the offcut, which is 23" long.
- Measuring the length of each side of the panel, which is now 23" on all four sides.
- Add the total length of all cuts: 23 + 23 + 23 + 23 + 23 = 115". Divide this by 12 to get us to feet: 115 ÷ 12 = 9.58.
- Divide error by total length: 0.04 ÷ 9.58 = 0.0042" of error over each foot of cut length.
The Five-Cut Method provides many woodworkers with a reliable way to determine the squareness of their panel cut when combined with a track saw, the GRS-16 Guide Rail Square, and proper technique. Whether you’re a seasoned professional or a DIY enthusiast, mastering this method will help elevate your woodworking projects to the next level.
Want to see this process in action? Check out Theiss Hilmar’s video, Testing the TSO GRS-16 PE Square with the FESTOOL FS1400 Guide Rail. Note his process only uses four cuts, requiring your first front edge to be perfectly straight, whereas the process in this article adds an additional cut to square that first edge.

Recent Posts
-
Building Your Own DIY MFT/3-Style 20mm Workbench Table
The 20×96mm workbench standard popularized by Festool’s MFT/3 has become a go-to foundation in moder …27th Jan 2026 -
JessEm Stock Guides for DeWalt Table Saws: Precision & Consistency
JessEm Stock Guides give you consistent hold-down pressure, one-way feed control, and include a slig …19th Dec 2025 -
What Size Guide Rail Do I Need? Choosing the Right Length (and When to Use Extensions)
The scenario: you need to make a cut in that full size plywood panel sitting in the corner of your s …6th Nov 2025


